Wednesday, March 27, 2013

Burlap Bubble Wedding Wreaths

How adorable are these burlap wreaths? My friend Melissa will be using them in her wedding this October. I had so much fun helping her make these yesterday (we were both enjoying our Spring Break - yay for having teacher friends to hang out with during break!). She is a very creative one!
Burlap Ribbon Wedding Wreaths

We cut each strip 5 inches wide and the entire length of the burlap we had. Melissa taught me a sweet way to cut burlap. After measuring, she pulled a string from the burlap, bunched the burlap up, and then when she pulled it back down, there was a nice straight line to cut on.

Cutting Burlap

We used jewelry wire to fasten the burlap onto the wreath, and continued bunching and fastening around the ring. Here's it after round one:

This is what the back looks like: (messy, yes, but it works)
 Continue until you cover the entire thing. And...

The front of the wreath
(see those spaces in between the burlap bubbles, we fixed those with some hot gun magic)

The back of the finished wreath

We added letters to spell out "I DO" since she is using these for her wedding, but with some other decorations, it would look great in a house! In fact...I'm thinking about making one for myself. We'll see :)
Burlap Bubble Wreaths 
I'll try to give you an update in October with how they looked at the wedding!


Monday, March 25, 2013

eShakti Dress Review

I was so excited to be contacted by eShakti to review one of their dresses! If you haven't heard of eShakti before, they are a company out of India that specializes in custom vintage-y dresses. I love that you can customize the length, sleeves, and necklines on most of their designs! Although the dresses were a little pricey for me, around $70, I really liked the styles I saw and, of course, the one I picked out!
EShakti Spring Easter Dress review
It took me forever (like 2 weeks) to pick out a dress because I am so indecisive and liked so many things! When I finally decided and placed my order (changed the length of the dress as one of the custom options), it was shipped via DHL 9 days later which I thought seemed good for a custom dress. They provided a tracking number and it came 3 days after that...but I wasn't home so they left a note for me to sign and then I got it the next day.

 I absolutely love it! The top is sheer. I love the flower print. And it has pockets which I think is totally awesome!
Floral print dress with invisible pocketsEShakti dress review
It came a little longer than I thought it would - I choose "above knee length" and as you can see, it IS above knee length. I just thought it would be a little higher as they also have a "knee length" option which is what I would consider this dress to be. Maybe this is because I said I was 5'8 and I'm really 5'7 and 3/4! So, if you want it a little shorter, give them your shorter height :) Other than that, it fits great. I love the fuller skirt too - makes me want to spin around like a little girl!
eshakti dress review

Brides and Bridesmaids
I really got excited when I saw their bridesmaid collection. Now, those dresses are a good deal! They have beautiful bridesmaid dresses all for about $60-$90 and each bridesmaid would be able to order her specific size - no annoying alterations! Also, if the bride wouldn't mind variety, each girl could choose a neckline, length, and sleeve style they would be comfortable with (or the bride can decide what she likes best, even if it's different from the original style on the website). If I knew about this site before my wedding, I probably would have ordered from here! Here are some of my favorite bridesmaid dresses:
Cheap and Customizable Bridesmaid DressesCheap and Beautiful Bridesmaid DressesInexpensive and Modest Bridesmaid Dresses

The pink dress is $60. Green dress is $75. Blue dress is $70. See more of their bridesmaid dresses here. If you have ever been a bridesmaid, you know those are amazing prices for bridesmaid dresses! And I know when I was looking for bridesmaid dresses, I ran into the problem that they were all so short. I ended up finding dresses that I loved for $80 at a Prom store that did come to the knees - but they were hard to find at a good price. Seriously, I think every bride should check out this site!! My only concern is that they seem to change their styles a lot, so you might want to contact customer service or have them all order at the same time just to be safe.

Deal: Save $25 on your first order and free customization on your first order too! (O my gosh, that would make bridesmaid dresses as low as $35!!) Well, plus shipping which might be around $12 - at least that's what showed up for me.

(I received this dress from eShakti for review purposes and was not compensated otherwise. All thoughts and opinions expressed are my own, don't worry, I would not lie to you!)


Saturday, March 23, 2013

Updated Spring / Easter Shelf with Free Printables

Since I last showed you my spring shelf, I added a couple of things.
Spring Easter Shelf with free printables
I think it looked good before but now I just can't stop looking at it! I love spring colors!!

(The middle frame totally doesn't belong...but it was all I had so it works for now. I love the subway art that's inside so that's what really matters)

And the best part - you can add my new additions too! I love free printables!!
free easter subway printable
The Easter subway art is from A Night Owl blog and comes in 3 different color versions plus in Spanish!

free easter banner printable
The Easter banner is from Cake Likes a Party. She also has one that says "Happy Spring." I taped each letter to string to make my banner since I didn't have a thicker ribbon to use.

Thanks ladies for adding so much fun and color to my Easter shelf!

Friday, March 22, 2013

Vera Bradley Baby Cuteness

O my gosh. I can't get over this cuteness! Dang it, Vera Bradley - you're making me want a baby and I don't really want one quite yet!!! Or do I? Ha, no, really, not yet, but I do have a little niece who needs spoiling! Check this out!
Vera Bradley Baby Collection
Vera Bradley Baby Clothes!!!!
Vera Bradley Baby BunnyVera Bradley Baby RomperVera Bradley Baby outfit
O my, isn't your heart just melting?! Check more more Vera baby adorableness here. They have socks, booties, piggy banks, bibs, and a variety of bags/diapering stuff/etc.

Vera Deals: Spend $50 on Baby and get a FREE Vera baby book - Bunny and Bear. Plus spend $75 and get free shipping.

Just wait...there's more!

Not only do they have adorable baby clothes...but they now have Vera Bradley baby stationary! (From Tiny Prints)

These are some of my favorites...

Joyful Expectation: Melon Baby Shower InvitationsBlooming Baby Birth Announcements Sublime Simplicity Birth Announcements Flowery Introduction Birth Announcements 
So many Vera Bradley designs to choose from for baby shower invitations, birth announcements, thank you cards, and address labels

Tiny Prints Coupon: 20% off with code 20MARSW (expires 3/26/13)

So aren't those the cutest things you have ever seen? Any other Vera Bradley fans out there? Did you know they started all this baby stuff!?


Monday, March 18, 2013

My Spring Bunny Shelf

 So spring officially begins in just a couple of days. And it's been snowing/sleeting out pretty much all day. Yuck! And to think last year at this time it was in the 80s...

Anyway, since I was getting excited for spring, I updated my shelf for Easter / Spring (and spent $0 doing it!) If you count everything I've bought in the past I spent $6. I know I don't have a lot of stuff, but here's what I did with what I have.
Spring Bunny / Easter shelf

I didn't even use a cutting machine for my bunnies! I printed off a bunny picture and then cut it out with an Xacto knife. I trimmed the bunny with a regular scissors after that.
1st step - print bunny on cute paperstep 2 - cut out the bunny with an xacto knife
step 3 - fix up the crazy lines from the xacto knife
I thought I would do something with both the purple and yellow bunnies...but so far only the yellow ones made the cut!
Of course I added some glitter with some Elmer's glue!


 photo IMG_6046.jpg
easter bunny silhouette with glitter 
And that's my glitterful bunny! Both frames I planned on painting when I got them, but ended up leaving them the way they were...and I actually have started to like them!!
 
easter bunny cutout in a frame + jelly bean "bunny poop"
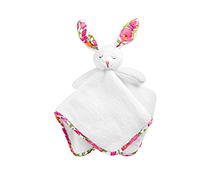
How cute is that little bunny peeking out of that frame?!

The frame was $1 at a church sale. I bought the "SPRING" blocks at a thrift store last year for $2. And those are real jelly beans, aka bunny poop, that I added for kicks and giggles.
And did you notice that I finally got matching candles for my candlesticks? $3 at Hobby Lobby with a 40% off coupon.
Spring / Easter Simple Shelf or Mantle Setup
Who else is ready for spring and bunny rabbits? I've already seen a few real bunnies in our neighborhood and they are just too cute!


Saturday, March 9, 2013

Teacher Talent Show & Zebra Print Shirt Tutorial

So I'm pretty sure my teachers in high school were never THIS cool! These ladies are my co-workers, many of them also special education teachers. Yes, we can get a little crazy as you can see (I'm the one on the ball in case you were wondering) but we do it all for the kids :)
 
Every year our school puts on a talent show.You might remember the dance we did last year. Our group is the "Remedy" and we dance. Oh, and I totally do a round off - you have to check it out! ha. We try to do a lot of popular songs that the kids enjoy. This year we did Levels by Avicii, Gangam, T. Swift, Call Me Maybe, Kiss You (One Direction), Thrift Shop, the Harlem Shake (hence the crazy props), among others.

You can see our performance below or here. It cracks me up and I hope you find it funny as well. I'm the blonde on the left, second to the end at the start of the dance. (It takes them a while to start the music and for us to all get on the stage, so feel free to skip the first 30 seconds) The end is the funniest so make sure you check us out doing the Harlem Shake!
 
So, what did you think?

And now for how we made our shirts:
Iron On Letters Tutorial:
Last year we puffy painted them, but this year we really liked the idea of Zebra print. I found these shirts and Zebra iron ons at Hobby Lobby. 
 
We used a Cricut and the Alphalicious Cartridge to cut out the letters. It worked best when the settings were changed to the highest pressure and lowest speed. Also we needed to tape down the iron-on so it wouldn't move around while cutting.

To iron it on you need to place the letters paper side up. As you can see below, not all of the paper came off when I tried to pull it off. Learning experience for all of us but we finally figured it out toward the end - the trick is to pull the paper off while it is still hot. It worked much better when we ironed each letter one at the time and then pulled off the paper on that letter. However, if yours turns out like mine you can scratch off the paper little by little and it will eventually work. :)

And here's the final shirt(s)! I love the zebra!!
Also, not sure if you could see it in the video but we each had a word on the back of our shirts that, when put all together, said "We Are Never Ever Ever Ever Getting Back Together." We did this by projecting each word on the white board, pinning up our shirts, and then tracing the word with the sharpie. Then we filled it in with puffy paint. And on our arms - socks and leg warmers! :)

And that's my sister-in-law with the Iron Man costume on under her shirt. How crazy that we ended up working at the same school!

I'm so thankful for such a fun group of co-workers! And for a good way to get a work out in too! :)

Tuesday, March 5, 2013

Living Room Entrance: New Bench and Coat Rack

Remember when I stenciled a wall in our front living room? You have have remembered that it looked a little odd with nothing against that wall. It kept bothering me so I finally did something about it! And if you read this title you know what I did with it. Here is my beautiful coat rack / bench:
Coat Rack and Bench against Stenciled Wall

A couple of weeks ago my husband and I bought this coat rack/bench thing at Bed, Bath, and Beyond. It was on clearance for $100 and we had a 20% off coupon which made it $80. Plus, we used in store credits that we still have left over from our wedding!! Yes, it came in a box.
bed bath and beyond bench box 
It was an adventure putting it together, but it was actually fun. Somehow I ended up working with the thing laying on top of me while trying to read the directions upside down and laughing hysterically. Yes, as I said, it was an adventure! :) We made a good team.

Here's what our lonely wall looked like before in case you forgot:

And after...
Metallic Paint Stenciled Wall Cutting Edge Stencils 
Such an improvement, right? We had to say good-bye to Francis (the snowman) though now that it's March! (Even though we are getting way more snow now than we did around Christmas time. In fact, I even have a snow day right now! Go figure.)

New blog news - I added Comment Luv through IntenseDebate to my blog! Let me know if you like the change or not. I figure it will make it easy for me to check out the rest of your awesome posts! (Update: not sure what I think about this...if you are on my main page it says this post has 0 comments, which is not true. Anyone know how to fix it? Anyone use something else for comments that I could try out?) Update #2: I got rid of IntenseDebate and entered the comments that were left on this post manually (I didn't want to lose those, so that's why the dates are off). Not worth it. I liked it somewhat especially the Comment Luv but didn't like seeing that I had 0 comments!!

Sunday, March 3, 2013

Baby Headband and Adorable Baby Pics

I got to take my niece Heidi's 3 month old baby pictures yesterday. It was a ton of fun. Also, I realized I still have a lot to learn about photography but it was a learning experience (like, even though I'm really excited about shooting with low aperture with my new lens does not mean I should keep it so low the entire time...), however I did end up with some cute pictures.

I made one of my own headbands into a baby headband for this photo shoot, so before I share adorable baby pictures, let me show you how I did it.
Baby Headband
This headband was extremely tight so I never wore it, so I gladly decided to tear it apart to see if I could make it baby proof!

Headband 
All of the fancy pieces of this headband were glued onto a felt piece that was connected to the headband. All I had to do was pull that all off. Really, it was almost too easy.
take headband apart 
 Hot Glue Stretchy Headband
Then, I got out my hot glue gun and glued it onto a stretchy headband. Ta-da! Perfect for a baby headband.

 photo IMG_5962.jpg 

And I do have to say, she looked pretty cute wearing it! Wouldn't you agree? And that drool is really too precious.
3 month baby photo

Oh, what is that you say, you want to see the other pictures I took? Well, here you go! Enjoy!
3 month baby photography 
 3 month baby photo 
 3 month baby photo

Three month baby photos

3 month baby photo
She is the cutest baby ever. I could take pictures of her all day. Thanks for letting me practice on you little cutie :) and, everyone else, thanks for reading!
Related Posts Plugin for WordPress, Blogger...
Blogging tips