Friday, July 29, 2011

Delicious Blueberry Buckle

I love blueberries, especially when they are fresh and not too ripe. Thanks to my wonderful parents I currently have 5 lbs of Michigan blueberries. I tried this new recipe for "Blueberry Buckle" and I love it! It's like blueberry muffins, only better!

 I made recipe cards for you, check them out here! There's two on a page so when you print it (I'd recommend using card stock or thicker paper) you can have one for you and one for a friend!
Blueberry Buckle Breakfast Recipe
Look at the recipe card to explain the directions, and here's some pictures so you can see how each step looks.

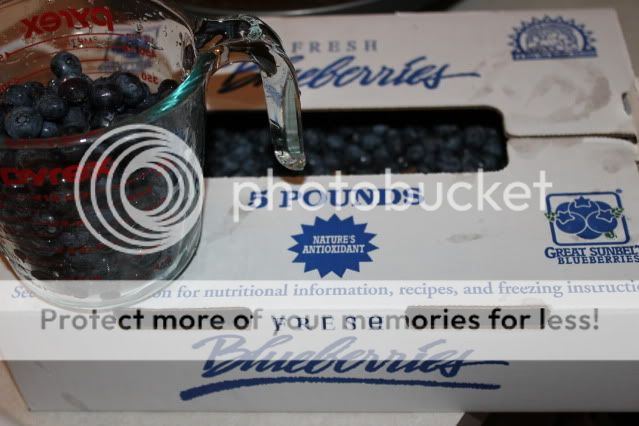
Step 1 - Not sure if I should have used the whisk attachment - especially after step 2!

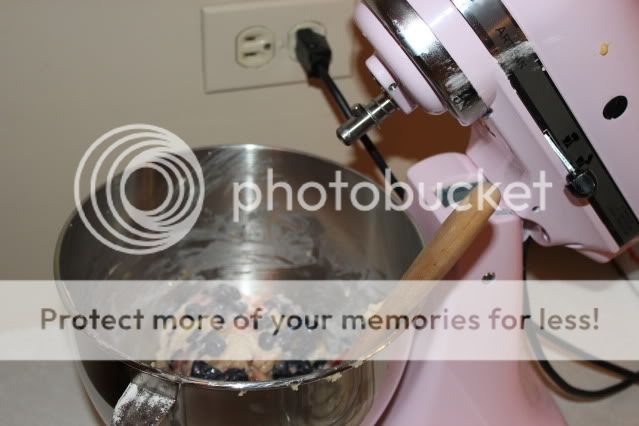
Step 2 - Yeah, I had fun fighting with the mixer to get all that off...

Step 3 - I had to take a picture so you could see the beautiful pink mixer too! I thought I would easily be able to pour it into the pan, but it reminded me of rice krispies how I had to spread it out.
Step 4 - Mmmm, mix it on up!

Step 5 - Look at how delicious it looks when it's baked! And it tastes even better!
I definitely recommend it! Let me know if you like the recipe card and if that is something you would like for me to continue with my recipes! :)

I'm linking up at a few of my favorite blogs here

Babysiting Photography Session

So, sometimes when I am babysitting I enjoy bringing along my camera. Taking pictures of kids is so fun and a good challenge to have! I'm sure I must be pretty entertaining to watch, making all sorts of crazy faces, bunny ears on myself - anything for the kids to look my way!

I also enjoy editing the pictures. Not that I know how to do a WHOLE lot, but I used some free actions from Pioneer Woman that you can find HERE.

Here's a sample...
Aren't they just ADORABLE! :) You can check out the rest here if you would like and then you can see the difference from the SOOC (straight out of the camera) shot and the edited ones! Thanks for looking!

P.S. I know I'm not a professional, but I am trying to learn how to make the most out of my new DSLR camera...if you have any tips or suggestions for me I'd love to hear them!

Thursday, July 28, 2011

Recipe: Pierogi Pizza Casserole


This is super easy and good too! Takes about 5 minutes to put together and 30 minutes to cook

What you need:

Pierogis (I used Mrs. Ts)
Pasta or Pizza Sauce
Pepperoni and/or ground beef
Mozzarella Cheese


1. Layer the bottom of the casserole dish with the pierogis
2. Pour some sauce over the pierogis - cover them pretty well, depends how much sauce you like :)
3. Layer with ground beef and/or pepperoni
 4. Top with Mozzarella Cheese
 5. Bake at 350 degrees for 30 minutes and ENJOY! :)

I almost forgot to take a picture when it was done, but here's the leftovers! :)
Yum, losta cheesy goodness! And hubby said this was a keeper, so I'm happy!

Wednesday, July 27, 2011

Cardboard "Tin" Stars

So, I've always liked the look of tin stars. The real ones can be expensive, now if you know me, that means I'll just find something else to like...UNLESS I can make it myself!

So, after some online searching, and the ideas from Grey Luster Girl, it cost me....nothing! Here's mine!
How to make barn stars out of cardboard
 It's quite simple actually. You just need some cardboard (I used a cereal box for the little one and a pizza box for the larger one). 

First step, trace and cut out your star. Don't have a star to trace? I used lined filler paper (because you can see through it) to trace a star I found on google images - then I traced that onto the cardboard.
Next, score the star 5 times, from each point. I pressed hard with a pen to make the creases. (You can see the creases in the above picture if you look closely)

Now, fold on all of your creases. It should look like this!
Next, I colored on the edges and creases with a sharpie, so after I painted it I could get these lines to show through and look more distressed, or like tin.
Now it's time to add the paint! For the little star I just mixed some green I had with white to get that color. Then I rubbed on edges and the creases to get the darkness from the sharpie to show a little bit more (picture is before I did that)

If you want to hang them up, add some string (I used embroidery floss) to the back with tape.
 (Yes, that is a Lucky Charms cereal box - my 24 year old husband still loves his sugary childhood cereal!)

And....here they are hanging up! Tada!
I'm not sure how I'm going to display them yet, but I'll try a few things! They are so much fun and really simple as you can tell!

If you make any I would LOVE to see how yours turn out!
Also, consider following me on facebook or twitter - I'd love making new blog friends! 

"My name is Brie and I like to party" - See where I've been linking up!

Monday, July 25, 2011

I Need a New Necklace Organizer!

Here is currently how I am keeping my necklaces from tangling...functional but not very pretty!
So, off I go to find some inspiration!

First, this one by The Crafty Clique is ADORABLE and so functional! I love all the colors and the various sections.
Here's another one that also looks so pretty from Noelic using a frame, corkboard and dresser knobs. Very classy looking
Or, this one from the blog Free Time Crafts. Just some wood, fabric, and hooks. I think something like this would also look cute painted and distressed. I love it.
Now, here's one that is quite original from Yellow Blackbird. She uses ribbon spools and hangs her necklaces off from there. Pottery Barn inspired and very unique!
Okay, time for me to get started and hopefully end up with something cuter than a leftover plastic hanger from Kohls...

Do you have a creative way to display your necklaces? I would love to hear from you!

UPDATE 7/28:
From Kasey -  "I had the same necklace problem. I found an old piece of wood, painted it and put some nails in it on an angle! Free and cute!"  Thanks so much for sharing! I love it! :)

My "Fancy" Vera Bradley Plastic Drawers

Wish I had a before picture...but I don't, so imagine with me a black dirty plastic drawer thing with random red scribbles and crazy skater-type stickers on the top. I see this on the curb and think, "hey, that looks like fun" so there starts this mini adventure!

So, what to do with it? Well, I love the Vera Bradley pattern, "Mod Floral Pink" (see below) and even though I am not artistic, it's pretty easy to draw while looking right after the pattern. So my inspiration...
So to start off (after I clean it of course) I sprayed the entire thing with green spray paint. Why green? Well, 1) I like the color green 2) I randomly had it on hand

Then I cut some cardstock to be the sizes I needed, spent some nights watching TV and drawing to create the top and the drawer fronts.

I then glued the large sheet on top, then realized it wasn't protected, so put clear contact paper on top.
Also, I tapped the papers to the inside of the drawers so I can write on the outside with a dry erase marker, so if I ever want to change whats in the drawer, not a problem!
I know it's not perfect, but it didn't cost me a thing since I used supplies I already had! :) I like it.
I'll move on to more high quality things soon(er or later!)

Sunday, July 24, 2011

Having fun with blog design!

Thought I would share with you all how I have been designing my blog if anyone happens to be curious!

First, I got the basic template from Jenieshell - and have been changing it up from there so it looks a bit different than how it started.

Trying to figure out how to work with CCS code is sort of a trial and error thing for me, but I found the tutorials at Shabby Blogs (and random google searches) extremely helpful.
Notice the signature at the bottom of each post, I made that on MyLiveSignature.com - I just picked a font, but you can draw your own (using a computer mouse, as if anyone could make that look good), or scan in a handwritten signature! Pretty cool. I had to put a code somewhere so it appears every time and Shabby Blogs explained how to do that here.

Also, notice the "About Me" page up on top. I hope to add more pages soon! :)
Now, for my favorite part of the blog, my beautiful header up top. I actually designed it at Scrapblog.com, had it emailed to my self full size, cropped it in Picasa, and Ta-Da!
 Thanks for looking! Hope you are liking what you see! :)

Saturday, July 23, 2011

My Homemade Popcorn Chicken

So I decided to try out a new recipe the other day. It was pretty great so I thought I'd share!

All you need:
  • 2 boneless chicken breasts (or more depending on how many you want to make)
  • Salt & Pepper
  • 1 cup Buttermilk (milk with some lemon juice works too)
  • 1 cup Flour
  • Canola Oil
Now get started!

Cut the chicken into about 1 inch pieces, season with salt and pepper, dip in buttermilk and then in the flour
Easy Homemade Popcorn Chicken Recipe
Looks lovely, doesn't it?

With about a 1/2 inch of canola oil in a large skillet on Med-High, fry up the chicken in batches (you don't want to do too many at a time or it might not cook properly)
It will take about 2 minutes per side - until golden (I probably did mine a bit too long as some are a little past golden)
Season with some more salt & serve!

We had ours dipped in barbecue sauce and with sweet corn. Yummm! Definitely a keeper!
What I would do differently next time: add more seasoning, many other recipes I found call for Cajun seasoning so I might try that or any other randoms I have! Also, I might make the pieces even smaller to make them more bite size! 
 
Related Posts Plugin for WordPress, Blogger...
Blogging tips